

The Importance of Insulation on your Cold Plunge
Standard technology within a high quality cold plunge is a chiller, circulation pump, filter, and cleaning system. The chiller and

Your wellness guide

Standard technology within a high quality cold plunge is a chiller, circulation pump, filter, and cleaning system. The chiller and

The Model 2 is an expensive purchase that demands careful preparation. We ship your order exclusively with our trusted carrier partners. The hot tub is very securely packaged in an enclosed wooden crate – this ensures that it is delivered to you safely. Our trusted freight carriers will deliver the Model 2 curbside (i.e. your driveway). From a liability perspective, they unfortunately are not able to place the unit in your backyard.

The best decision is one that will enhance your overall experience of the Model 2, no matter where you decide to place it.

Maintaining pristine water quality is essential for the safety, comfort, and longevity of your cold plunge experience. Just as you invested in the design and construction of your cold plunge, it’s equally important that you invest in its chemical maintenance.

This article outlines how to resolve an airlock issue in your hot tub. It details two ways to identify an airlock and provides a step-by-step guide to fixing the problem.
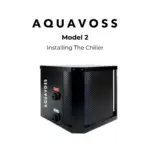
Most of the cold plunge system is installed prior to delivery (the piping, the circulation pump, the ozone, the drains, the filter, etc.) and ready to go upon delivery. The chiller, however, was disconnected from the system before it was shipped out to you. Here is the reasoning … the chiller has refrigerant inside of it. The chiller cannot be pre-installed as the refrigerant would spill and in turn cause long-term damage to the unit. Therefore, we securely packaged the chiller inside of the cold plunge tank so that the refrigerant does not spill during the shipping process. In this blog, we are going to walk you through how to connect the chiller back into the system so that your cold plunge side is operational (this does not require any particular expertise). Please refer to the video below as well as the following instructions for guidance on how to install the Aquavoss Model 2 chiller: https://www.youtube.com/watch?v=_BaMeJs13Nk&t=128s 1. Remove the chiller from the cold plunge tank The chiller was strapped securely inside of the cold plunge tank. As you were unboxing the product, you should have seen signage and warning labels indicating where the chiller is and that it must be removed prior to laying the Model 2 horizontally. Remove the chiller from the cold plunge tank – make sure that the chiller is always upside right as you want to ensure that refrigerant never spills. 2. Remove the access cabinet The technology for both the cold plunge and the hot tub are inside the “access cabinet”. The access cabinet can be identified in three ways: a. The access cabinet is on the same side as the thicker part of the acrylic shell. b. The access cabinet has the larger vent on it as well. c. There is a black handle in the middle of the side panel (not featured in image). Remove the two black corner pieces by gently pulling them away from the unit. Once you remove the black corner pieces, there will be four screws exposed on each corner of the cabinet as shown in the image below. Remove the screws using the Allen wrench that was provided to you in the welcome package. After you have removed the screws, then pull using the black handle at the base of the panel (not shown in image). The panel is also magnetic so give it a good tug to remove it. IMPORTANT: The panel was designed to be very easy to access. Once you remove the screws for the first time, you do not need to re-insert them when you close the panel. The panel and corner pieces are magnetic – screws are not needed to keep them in position (therefore making it very easy to access). Keep the screws in case you ever want them for the future. 3. Unbox the chiller (keep it right side up to avoid spilling the refrigerant!) 4. Place the chiller onto the stainless steel frame inside of the access cabinet 5. Use the Allen wrench and the provided hexagonal headless screws to secure the chiller to the Model 2 frame The hinge is already on the stainless steel frame. There are four hinges (one on each corner of the chiller). Secure the chiller to all four hinges using the Allen wrench and provided screws. 6. Connect the chiller to the cold plunge control panel The cold plunge control panel is already pre-installed to the side panel. The control panel has three cords hanging from it – there are also three cords grouped together that are connected to the chiller. These three connections need to be made as shown in the picture below. Ensure that these are all plugged in securely as anything that is loose could lead to a problem with the proper functionality of the chiller and the control panel. 7. Connect the chiller to the circulation pump Behind the chiller, there is a small black cylindrical circulation pump as shown in the image below. You will notice a free-hanging cord next to the circulation pump with a female connector. Plug this female connector into the corresponding male cord that is connected to the chiller. This connection powers the circulation pump, the device that will circulate water in and out of the cold plunge tank. 8. Connect the chiller to the Ozone cleaning system The Ozone can be found on the underside of the Acrylic shell. You will find there a box labeled “Ozone” with a female electrical cord hanging from it. Plug that electrical connection to the corresponding cord on the chiller. 9. Install the cold plunge filter Included in your welcome package are two filters: one for the hot tub side and one for the cold plunge side. The smaller filter is for the cold plunge. You will find the filter house behind the chiller (next to the circulation pump). Remove the filter house cap by twisting counter clockwise. Use the filter wrench (if needed) to assist in removing the filter house cap. Center the filter onto the filter house base. Place the filter house cap on top of the filter house base twist clockwise to reattach the entire filter house. 10. Feed the 110v male electrical plug from the chiller and out the side panel Locate the cold plunge electrical access point and remove the cap from the hole. Run the male electrical cord (connected to the chiller) out through the hole. Place the cap back on top to cover the remainder of the hole. Note: Depending on the orientation of your house, it may make sense instead to run the extension cord into the cabinet. This is recommended for outdoor set-ups to prevent any rain damage to the electrical cords. Important: Do not plug in the electrical cord until the cold plunge tank has been filled with water. 11. Fill the cold plunge with water You’re almost there! Take your closest garden hose and start filling the cold plunge tank with water. It’s recommended to fill the

The hot tub runs on a 220v electrical connection and you will need a licensed electrician to properly install the Aquavoss Model 2.

The Model 2 is an expensive purchase that demands careful preparation. We ship your order exclusively with our trusted carrier partners. The hot tub is very securely packaged in an enclosed wooden crate – this ensures that it is delivered to you safely. Our trusted freight carriers will deliver the Model 2 curbside (i.e. your driveway). From a liability perspective, they unfortunately are not able to place the unit in your backyard.